PAGES

Wednesday, August 29, 2012

Hard to believe...

It's hard to believe that this time last year, I was busy trying to pull together my wedding.  In two weeks, Dan and I will be celebrating our first year of marriage!  It's been a great year, full of so many things, that it's hard to believe that we've only been married for a year, and only been a couple for three.  I can hardly remember my life before Dan.


As I mentioned on Monday, I'm winding my shop down so I can rest and work on new items.  This means that I will not be taking rush order and I will not be emailing patterns.  I will continue to add new orders to my queue. I just need a little mental break, and a little time to spend the love of my life, doing things we enjoy, like going on uninterrupted hikes and having uninterrupted dinners at fancy restaurants.

I am very excited to be working on a new collection.  The most challenging thing for me is sewing the same items over and over again.  I love the thrill of seeing something new come to life! I'm also looking forward to a pre-Christmas Sample Sale.  I have a drawer full of goodies that will need to go soon, and in a variety of sizes, from XS to XL, so stay posted for that in a month of two!

Monday, August 27, 2012

Monday


Two day weekends really suck after having a 5 day weekend.  I always manage to cram a lot into two days.  I cleaned my house, quite literally from bottom to the top, had a friend stop by for a visit to see the house, had dinner with my parents, finished up a couple more orders, napped, went shopping, and fit in some movie-watching as well.

I am in the midst of letting my shop wind down so that I can get a little bit of R&R.  I haven't been feeling very well lately, and I think it has a little bit to do with the fact that I've been burning the candle at both ends for a little too long. Lots has happened! So many good things, a few stressful things, and I need a little break.  I also am really wanting to work on a few new Fall / Winter pieces. 

I am craving Fall like no one's business.  It's still so hot here, was in the 30's (Celcius) this weekend, but I busted out my fall wreath, and dug out my flannel sleep shorts.  I'm ready for the heat to end and the crispness of fall to begin! I have some lovely heather grey jersey, blush sequinned net, jewel toned crushed velvet,  nude lace, and a bunch of Venice lace appliqués that will become a part of my fall / winter collection.

Fall is my favourite season.  I love the food, the way the air smells, cool rosy cheeks, the leaves, the colours...  And of course, Halloween!


Friday, August 24, 2012

Can't Resist the Ruffle


I'm not going to even talk about how my day went yesterday.  You know those days where everything has just gone so wrong that you don't even know where to start? That's what I walked into yesterday morning. Definitely not a great way to start my week, but on the bright side, today is Friday! 


This is the final set I made as a part of the custom order that I had free creative reign over.  This was my "demure" piece.  I made my Carolyn Cami out of purple and cream bias cut floral fabric, paired with ivory stretch lace and pearl buttons.  When added 3 layers of ruffles around the hips of the cami for a little extra something.


Thursday, August 23, 2012

Good Morning


Good Morning everyone! I've been up since 6:30 editing photos and responding to emails... and now I'm just about to head off to my office job.  I am feeling extra anxious this morning. I never quite know what I'm going to walk into after a day or two off, which I find extremely stressful.  The last few days of being at home and being able to focus solely on Ohhh Lulu has been so nice, a little taste of what is to come... but for now I need to plug away at my "day job" until Dan feels a little more comfortable in his new position.  Why do I feel like whenever I feel close to making the leap the universe conspires against me? *Sigh* My day will come! And it will be sweet.


In completely unrelated news, I had my eyes checked yesterday.  Previously I had better than 20/20 vision - super human vision as I liked to call it.  I no longer have super human vision, just slightly off vision... so slight that I do not even require glasses but could use them to make watching tv or driving more comfortable.  For the first time in my life, I felt old! Something in me is not quite what it used to be.  What a strange feeling...

In more unrelated news, but news that excites me nonetheless, Dan and I have purchased two new doors for our house.  This may not seem exciting, but if you were to see the condition of our current doors you would understand.  The front door had been kicked in at one point and is cracked down the middle.  You need to body-check it quite hard (good thing I watched a lot of hockey growing up, so I know how do to this) in order to get it locked.  It also has a lovely featured - a fort knox style slide lock.  So, I will be glad to see the hideous broken door gone, and my lovely new doors with the big glass windows installed. Just in time for winter!

Wednesday, August 22, 2012

Finally!


It feels good to finally sit down and show off some of the fruits of my labour! I've been "off" the last 5 days, catching up on orders.  On Saturday I came down with some mysterious malady that made me extremely exhausted, headach-y, stomach ach-y, hot / cold, and all over miserable.  I spent a good chunk of the weekend sleeping, which is not at all like me.  Sleep is for the weak!!!

I did manage to get quite a bit of sewing in, and have 7 orders going out tomorrow morning.  This pink and black set was part of a custom order that I had free creative range with.  These are my favourite orders.


I love how this turned out, and it made me remember how much I LOVE Pink & Black.  It is so feminine and sexy.  This customer ordered 2 sets and a slip. I wanted to give her a variety of items, so I designed one set to be sexy, one set to be demure and sweet, and one set to be glamorous.  This is the 'sexy' set.  I think I need to make one just like it for myself!


Monday, August 20, 2012

A quick "hello"

I am off the majority of this week, trying to catch up on orders.  Thanks to everyone who is waiting for an order, for your patience.  You guys are the best!  Right now, I have a beautiful aqua coloured slip on my sewing table that I can't wait to show...

In the mean time, I wanted to share an interview I did for the Examiner, and let you know that they are hosting a give away!

Thursday, August 16, 2012

Blog Love!


Oh, I love the internet.  So many cool people to meet.  I have been really lucky to have the opportunity to get to know Madalynne, after releasing my Betty Pattern.  She is one talented woman and has some mad photoshop skills.  She posted her take on my Betty knickers, and shows you how you can straighten your princess seams.  Madalynne found that her fabric stretched a lot on the bias.  Every fabric is a little different.  Cutting an even square of fabric, then measuring how much it stretches, can help you determine if you need to cut a smaller size.  I still stand by the fact that fitting is an art, not a science! PS.  There is a give away going on over at Madalynne.com for a voucher for Flirty Thirties that I think you might be interested in!


I was really surprised to find my Ballet Pink set featured on the website of the Finnish Magazine, Trend!  Little, small town me never could have imagined someone so far away liking what I do! I wish Google Translate could translate Finnish a little better because it looks like an awesome magazine!
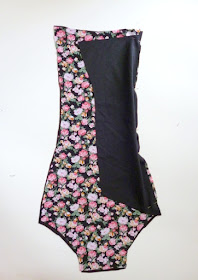
Wednesday, August 15, 2012

What's on the go

A rare picture of the face of Ohhh Lulu! 

This summer has been great!  So many awesome things have happened for my little business and I've been learning many lessons!  I am glad to have the Ginger Sew Along wrapped up, and detailed instructions posted for those of you who have it on  your "to sew" list.  As many of you know, I made a error on page 11 of the pattern, so if you haven't received my revised version yet, send me over an email and I'll get it right over to you! Can I chalk it up to having too many things on the go?...

Interesting things I am learning about running your own business...  The first, and worst thing is, when a mistake happens, there's only one person to take the responsibility for it! This can be hard, but at the same time, I am learning to take my mistakes in stride.  Fix it, learn from it, and get over it.  The "getting over it" part was something I was never good at, but am getting better at it with every mistake I make!!! I think this is not only an important business lesson, but a life lesson.  

The best thing about running a small business is the amazing people I have had the opportunity to get to know.  I really can't say enough nice things about all of you guys, and everyone I've had the chance to converse with through email about the patterns, sewing, design, etc.  I honestly just feel so fortunate every day to be doing what I'm doing.  Tired, but fortunate! 

I am really looking forward to fall; having some quiet, "nesting time."  I plan to release one more pattern this fall - that 1930's reproduction bralette pattern that I made last winter.   I also plan to sew a few pieces from the book, Vintage Lingerie (There will be a giveaway too!). 

I am finding that the garment side of my business is picking up more and more, so I am going to be devoting myself to that for the time being (it is my #1 love).  I have a bunch of big custom orders on the go that I am excited about because I have some creative freedom with them.  I also will be re-stocking my Etsy Shop with new 3 for $60 cheeky panties and some fall/winter items.

But for now, I am headed off to the "day job"! See ya!   

The Ginger Swimsuit Sew Along: Finishing with Elastic


Once all of the major assembly has been completed (side seams and crotch seam), and we've basted on our shoulder straps, we can sew the elastic the leg openings and neckline.  To get an idea of the length of elastic you need, wrap a piece of elastic snugly around your leg, or around the chest where the neckline will sit.  Snip about 1" longer than what you need.  Using a long zig zag stitch, anchor one end to the right side of the swimsuit, as close to the raw edge as you can get it neatly - if you have seam allowance that hangs over, that is fine, just snip it afterwards.


As you begin to stitch, gently pull the elastic - you will see that as you stitch, the elastic will start to "wrinkle" the fabric it is attached to.  I do not have a real formula for this... After sewing a million pairs of panties, you get the knack for how tight to pull it.  If you haven't sewn elastic like this, you might want to try on a few scraps, or on your muslin first to test out your tension.  You do not want to shirr your fabric, you just want to create some tension so that your suit doesn't ride up or fall down!

When my zig-zag stitch zags to the left, in towards the garment, I am stitching just over the elastic.

When I get to the end, I just overlap my elastic, and zig-zag in place. This is the most easy way to finish your elastic - For me this is a fun summer sewing project, and I am after easy. Alternatively, you can begin by sewing your elastic into a loop and stitching it on, OR sew your elastic on prior to sewing your crotch seam (and leave the top of one side seam open at the neckline).  This way, when you sew your crotch seam your raw edges of elastic get hidden in the seam.  If you do it this way, I highly recommend top stitching the seam down, or at least doing a bar tack to securely anchor the elastic down.  There will be a lot of tension at that seam, and the last thing you want is it unravelling at the beach!


Trim off any excess fabric that extends beyond your elastic, fold under, and top stitchwith a wide zig-zag stitch. When the needle zigs to the right, I am about 1/8" away from my edge. When the needle zags to the left, I clear the elastic on the other side.


And there you go - snug, elasticized leg openings and neck openings.


Monday, August 13, 2012

The ginger Sew Along: Adjustable Straps.


If you haven't done so already, you can go a head and stitch up your side seams.  Depending on how you want to finish your elastic, you may want to leave 1" open at the neckline on 1 side seam, or when we get there, you can just overlap your elastic, like I will be doing.


Like for any strap, you are going to cut a long strip of fabric.  My sliders are 1/2" sliders, so I cut a piece of fabric that was 2" wide.  1/2" seam allowance on either side + 1/2" x2 for my actual strap. The total length should be about 45".

Right sides together, I serged my strip into a long tube.  Using a safety pin, I turned it inside out. 


Then I divided my tube into 4 parts - 2 2" pieces, and 2 roughly 18-20" pieces (if your straps will be stretchy like mine, I recommend cutting them on the smaller side)


Using a light iron, press your strip flat (Careful not to singe your spandex!).  Stitch your tubes onto the o-rings and sliders.  Back Tack, or bar tack these in place.  Loop your long strip through the o-ring, and weave it through your slider. 

Right sides together, baste the strap onto the front and the back.  I put mine at the peak of the the cup in the front, and at the side back seam in the back.  Be careful not to twist your strap! This is very important because next we will be applying our elastic and you really won't want to be picking those stitches out (trust me, I have done, and will continue to do this!).


Strap Alternative #1: If you do not want this style of strap, sew two long tubes, any desired width, and about 20" long, baste them to the front only, tie behind the neck, and Voila! - halter straps.

Strap Alternative #2: Sew 4 tubes, 20" long each, any desired width.  Baste one on the peak of each cup, and one at each side back seam - tie the straps at the shoulder and turn under the ends.  Bow-straps!

Sunday, August 12, 2012

Sunday Panties & Painting


As many of you know, my husband is a mechanic.  What you might not know, is before he became a mechanic he studied fine art. Dan starts his new job next Monday, so he's gotten a "surprise" two week vacation between jobs.  Yesterday he dug out his oil paints and painted this portrait of me, which he just finished this afternoon. 


*sigh* He's just so incredible... and dreamy too.  He can fix a car, paint your picture... and gives a damn good foot-rub.  How did I get so lucky?

I spent my days ruffling meter after meter of satin, working on two Petals Sets - one high waisted and the other 'as is', and a couple of other things.  Throw in some Chevron, and a little Bon Voyage, and that sums up my weekend!


Tonight we will snuggle down and watch some Walking Dead... I splurged and bought a bottle of Chartreuse which we will drink with Hot Chocolate. Yum yum... Happy Sunday everyone!

Friday, August 10, 2012

The Ginger Swimsuit Sew Along: Adding a little support


If you are larger chested, you might find that you need some support under the cups to keep everything in place.  Before you sew your side seams, you might want to try adding a piece of 1/2" wide elastic onto your seam allowance, under your cups.  For those of you who followed the Oooh La La Sew Along, we'll be doing the exact same thing we did there!  This step is completely optional! 


See the yellow dashed lines? That's where I need some more support.  I am going to apply the elastic right along the seam allowance where the bust cups meet the body of the swimsuit.

Line your elastic up with the seam line, so that the excess of the elastic hangs over the seam allowance.  Using a long zig-zag stitch, make a couple of stitches through your elastic and your seam allowance to anchor the elastic.  As you sew, gently pull the elastic so you create just a LITTLE bit of tension.  We want the elastic to just hold the base of the cups closer to our bodies, we do not want to pull so tight that it shirrs the fabric.


When you get to the center, with the needle down, lift the presser foot, gently pivot, and continue on.  You could easily do the same thing by adding clear elastic into your seam line.


If you need some extra clarification on this step, Visit this Post, which talks about it in more depth.  Once you have zig-zagged the elastic on, you can top stitch with a zig-zag stitch, or twin needle, or just leave it loose. 

Ginger Swimsuit Sew Along: Sewing the Seams + Flat Lining


While swimsuits are normally sewn with a serger, I've sewn bathing suits for myself before on a straight stitch machine.  If you only have a straight stitch, long-length, narrow-width zig zag stitches are your friend, as is gently pulling your fabric as you sew, so that your seams will stretch. Most machines, if not all, can accommodate twin needles.  This is also an excellent way to achieve a stretchy seam without a serger. I am a firm believer in making do with what you've got at hand!


You are going to start by layering your lining and self pieces, wrong sides together.  You will treat them as one piece.  Line up your side back and centre back piece, and stitch together, 1/2" away from the raw edge. 


You will assemble the front in the same manner.  Layering your self and lining, treating as one, and sewing side front to centre front, ending up with this:


Looks nice and neat on the inside, huh?


Flat lining is the easiest way to line a garment, since you just treat your lining and self as one piece.  I like this method for lingerie and swimsuits because it prevents any shifting between the lining and outer layer, which is important on garments that are close fitting.  A shifted lining can cause lumps and bumps that show through.

Once you have completed sewing the side fronts to the centre, you can stitch your bust cups on.  I start my stitching line from the centre.  For me this is the best way to keep that nice sharp point where the cups meet in the centre!


Thursday, August 9, 2012

Oh what a week!

Well Dan got that job, so I've lost my house-husband/ chauffeur! But I am very excited for him to start this new venture!

I am so grateful it is Thursday already... This has been one heck of a week!  On Tuesday morning, Dan got let go from his job.  He had already been handing out resumes because work had been slow and he wasn't enjoying it there, and was lucky to get an interview pretty quickly, but it still came as quite a shock, and I can't help but feel a bit of deja vu!  Didn't this happen last summer, at a franchise that also started with an "M"? Weird!

The timing for these things is always so peculiar - right on the cusp of me being ready to take the leap! Ohhh Lulu is doing so fantastic right now, but it is hard to rely solely on a small business.  Luckily I talked to my boss about how overwhelmed I am with the amount of work on my plate, and she is open to the idea of me doing 2 or 3 days a week at the office, and training someone to do what I do there. My day job has it's moments of serious frustration, but working for someone who is an entrepreneur herself, she understand my position.

Of course, on  top of that, is life.  I had my yearly (ok, once in three years...) check up yesterday and am healthy, but need to have blood work, an ultrasound for an ongoing "issue", an eye exam because I am having headaches from straining my eyes over my sewing machine.... so I need to fit all this life-business in as well.  So, the next time you see me, I may be wearing some chic reading glasses.  My doctor says this is what happens when you get "older!"  While I'd rather be spending my time sewing than waiting in the Doctor's office, I will be happy to be able to see and not get so many headaches...

On the fantastic side of things, since Tuesday, Dan has had an interview at a shop that sounds great - nice work atmosphere, and great pay.  He also has been looking into another job, not quite as a mechanic, but working with cars, that he is very interested in.  So, I feel hopeful and excited for Dan to move on to a new position... I never liked the place he was working at anyway!


So, that is life right now, nothing I can't handle and am not terribly stressed about it.  It's nice to have a stay-at-home husband to clean the house and chauffeur you everywhere.  I could really get used to it!

Sunday, August 5, 2012

How to take your own measurements...

Taking your own measurements isn't easy.  First of all, sometimes it's a shock to see what the numbers actually show.  Secondly, many people are unsure of where their natural waist or hip is.  Unless you've taken a fitting course, it's not really common knowledge.  I wanted to show where to measure on a *real* body - We have all seen measurement diagrams on a croquis, but because no one looks like a fashion croquis, it can be hard to relate it back to our actual bodies.

Start either in your skivvies, a tight fitting dress, or a tight tank top and leggings.  Wear an unpadded bra, or no bra.

To measure your true bust, find the fullest part of your chest, and wrap the measuring tape around so that it is parallel to the floor - it should not go up higher or lower in the back, than it is in the front.  To determine your band, measure below the bust, right around where a bra band would sit.
Measuring your waist is a little more tricky.  A lot of people think that their waist is either a) where their pants sit, or b) where their belly button is. While that is sometimes the case, it is not always 100% accurate.  To find the narrowest part of the waist, wrap a measuring tape around your waist - area, and bend from side to side.  Wiggle Wiggle! The tape will end up nestled in the narrowest part of your waist.  This measurement is your waist measurement.
 Your hips, like your bust, should be measured around the fullest point. Take along look at yourself straight on in the mirror, as well as in profile.  You want to wrap the tape comfortable around your seat.  Here's your hip measurement.
 Your High Hip sits around where a pair of hipster panties would sit.  This is a helpful measurement for fitting.
The deadly sins of measuring include pulling the tape TOO TIGHT! I have to admit, it's tempting to pull round down to the lower inch, or suck in a little bit, but accurate measurements are so important. Plus, it's not the number that counts, it's how you carry it!  Make sure you check yourself from multiple angles to avoid measuring too high or too low. Always keep your measuring tape paralell to the ground as much as possible - the tape will sometimes want to dip up or down in the back, which can add on inches.


Ginger Swimsuit Sew Along: Assembling the Cups


The first part of construction, is assembling the bust cups.  What you do to the exterior fabric, you will do to the lining.

Start by pinning your upper cup to your lower cup, easing in any excess. 


Sew 1/2" away from the raw edge.  I'm straight stitching mine.


Any time you sew a seam that curves out, you always have to notch your seam allowance, so that when you press your seam allowance open, you avoid any extra bulk.


Once you have assembled both cups, sew them together down the centre seam.  To ensure that the horizontal lines running across the bust match up, I often place them together (right sides together), and make a small tack on the sewing machine, through the seam that I want to match up.  I find this works better than pins, because pins can slip.  This is an easy way to get seams that match up, every time.

After you have sewing your lining and your self, and notched your seam allowance, using a pressing ham, press your seams open.


 Now we are sewing our cups to our lining.  Mine sit about 1" up from my raw edge at the end, and about 1/2" up from my raw edge, towards the middle of the cup.  I want to avoid getting the cup stuck in the seam where the body of the swim suit gets stitched on.  This is why I have placed it here.


I stitched around the entire circumference of my cups, directly onto my lining.  I literally placed the lining over my bust, the smacked the cups down over top to see where they felt "natural."  You'll feel like a goof, but it's the best way to see where the cups will feel best on you. I get the weirdest looks from Dan when I sew...


Now that the padded cups are stitched in, lay your exterior fabric over top, so that the wrong side of the lining is facing the wrong side of your self fabric, and baste the two parts together.  Now you can treat this as 1 piece throughout the rest of the process.