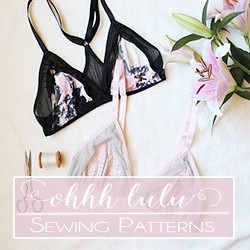
The Brigette Triangle Bra is my favourite bra pattern. While it is still a light-support garment, it can also offer adequate coverage for larger busts, while also being sexy and fitting well under every-day clothes. There are lots of interesting ways to style the Brigette Bra - you can sew it in a solid jersey, sheer lace, add bows or ruffles, or add trendy strap detailing like I'm about to show you here!
What you will need:
2. Supplies for the Brigette Bra
3. Three additional 1/2" Rings
4. Three pieces of 1/2" strap elastic, approximately 2" long each.
5. Approximately 1/2-3/4 yard (depending on size of bra you are making) additional fold over elastic

Instructions:
1. Assemble the bra according to the pattern instructions, and apply neckline elastic.
2. Fold additional piece of Fold Over Elastic in half and stitch closed with a zig-zag stitch.
3. Cut the stitched piece of FOE (fold over elastic) in half and trim it back so that it measure approximately 1" longer than the front neckline edge (see picture below).
4. Wrap 2" lengths of strap elastic around metal rings and stitch closed.
5. With a zig-zag stitch, apply band elastic to the right side of the garment. Decorative edge of band elastic should be pointing up, towards the top of the garment as it will get folded under in a later step.
6. Baste one metal ring piece onto the the wrong side of the (CF) Center Front of the garment and trim back any excess seam allowance. The piece of strapping should extend approximatley 1/2" beyond the band elastic.
7. Turn Band Elastic under and top stitch in place with a zig-zag stitch, as directed in the pattern instructions. When you get to the CF, stitch carefully over the piece of strapping.
8. Apply elastic to the remaining upper edge of the bra, leaving a 1" tail of elastic beyond the "peak" of the cup - follow the pattern instructions for how to apply elastic.
9. Place the Strap & Ring piece over the "Tail" of elastic that extends beyond the cup, and secure in place with a row of stitching.
 |
| (sorry for the fuzzy photo!) |
10. Turn the excess elastic under and top stitch across with a narrow zig-zag stitch. Make sure to careful back-tack in place as this will become a point of stress on the garment - you'll want to make sure it's stitched securely!

11. We now have rings placed at the CF and peak of each cup!
12. Using the folded pieces of FOE, secure one end of each piece around the CF ring. I use a zig-zag stitch to secure in place. Trim back excess FOE as close to your stitching line as possible.
13. Wrap opposite end through the ring at the peak of the cup. The folded piece of FOE should run parallel with the edge of the Front Neckline.
14. Follow the pattern directions to complete the straps and back closure.
And... that's it! It's a few more steps and some fiddly details, but this style looks great under loose tanks and sheer tops. You can easily use this same tutorial to add strap detailing to the Sarah Longline Bralette as well!


Fabulous adaptation!
ReplyDeleteSO SEXY!!! I have so many supplies on hand to hack your pattern in a similar way and got discouraged after a fail!! This is motivation!!
ReplyDeleteIs it possible to make this pattern using swimsuit material and add padding?
ReplyDelete