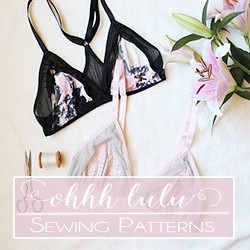
The Jasmine bra is a light support bra. Adding pre-formed foam cups can help give your bra a little extra shape and structure. Foam pads come in a variety of styles - balconette, push-up, triangle, etc, and can be found at most sewing supply stores. My local Fabricland (for Canadians) carries foam cups, but you can also find them for sale on Etsy and other sewing supply stores - just search for foam bra cups. This tutorial is excellent to use if you want to sew your Jasmine as a Bikini Top. You can also use this basic concept to add padding to any of my bra patterns.
What you will need:
1. The Jasmine Bra Pattern (available on Ohhh Lulu Sews)
2. Supplies for the Jasmine bra PLUS fabric for lining (Lining is a MUST) - I recommend a plain cotton jersey, or swimsuit lining if you are making the top into a swimsuit.
3. Foam Cups
 |
| Style Lines for the Jasmine Bra Pattern |
Bra cups come in different shapes and sizes. If you were to browse through any large sewing supply store, you may find Balconette, Swimsuit, Triangle, and Push-Up Pads. I generally use Balconette Cups in the Jasmine Bra - they are the most versatile. Swimsuit cups, which have a less oval shape and generally tend to be lighter weight, work great as well. You can also find specially shaped triangle cups which will fit into my triangle shaped bras.
If you are putting in a cup larger than a DD, you will need to adjust the height of the pattern and I highly recommend sewing a mock-up first.
 |
1. Sew your front exterior and lining according to Pattern Instructions.
2. Place a foam cup over the wrong side of the fabric. Below, you can see where I've placed the balconette cup, the centre front point sits about 1/2" away from the centre front seam line and is centred vertically along the front princess seam. When I make these for myself, I do a lot of "trying on" as I go. I'll actually hold the lining over my body, and place the cup where it sits best on my bust. The most important part here is that the the wrong-side of the lining fall into the inward curve of the cup. You don't want to put your cup on backwards/inside out!
 |
| Using my fingers to feel the edge of the foam cup as I stitch the cup directly onto the interior of the lining |
 |
| Cups stitched onto both sides of the lining. |
4. Place your outer shell over top of the lining so that the padding is sandwiched between the layers. Line up your lining and exterior seam-lines, and baste along the lower edge of the bra. When you are done, you will notice that the outer layer appears shorter. That's because it now has to curve over the cup. You can now baste the upper edge in a similar fashion as you did the lower, but just be aware that it is A-OK that the the lining peak out about 1/8"-1/4" above your exterior - this can be trimmed back when you are done basting.
 |
| Baste Lower Edge First |
5. Sew on the bra band at the side seams, and complete the bra using the instructions provided in the pattern. You can use many different types of elastic edging for the neckline of the Jasmine Bra, but when padding the bra, I find that Foldover Elastic is the easiest to manage.
 |
| Finished Interior - just needs straps! |
 |
| Padded Jasmine Exterior |
That's it! Just a few extra steps and you can make yourself a super-comfortable padded bralette or swimsuit top.


Very useful tutorial!
ReplyDeleteThanks! Beautiful example too!
Thank you so much for this hack!!! I can't wait to make one!
ReplyDeleteThank you, Sarah! Best regards from Russia ;)
ReplyDeleteGasp! You are so, so generous with your "secrets!" I only just recently stumbled across your shop, patterns, and now these tutorials. You are amazing! Thank you so much, from the bottom of my now-custom-home-made-bra-covered heart!
ReplyDelete